Wednesday, February 27, 2013
New Fence
Well out with the old in with the new. FENCE that is. Had a picket fence put in about 10 years ago never really liked it after it was done. So today I am putting in a chain link fence. Perfect for growing vines on and also perfect for hurricanes wind will blow right through and leave the fence standing not like the 2 board fences I had to replace after a hurricane.

Monday, February 18, 2013
Honey Bees At Home
Read this from the National Home Gardening Club enjoy.
Honey Bees At Home
Want an army of pollinators who make honey for you in their spare time? Just provide the hive and let the bees do the work!

Think of it as room and board for dedicated garden workers who will boost your harvest and provide you with half your body weight in honey. If you turn a corner of your yard into an apiary—a home for honey bees—you’ll get a lot of help with pollinating (which will boost your plants’ production of fruits and vegetables) and more honey than you can eat. Raising bees in your own backyard might sound crazy, but the risks are minimal and the rewards are sweet.
The Buzz on Bees
There are more than 4,000 bee species native to North America, but the imported European honey bee (Apis mellifera) is the species to which the term “beekeeping” typically refers. Honey bees have a set division of labor within their colonies, which can include as many as 80,000 bees. The queen is the core of the hive and the only female that mates and lays fertile eggs. Drones are male bees; their sole purpose is to mate with the queen. The rest of the bees are female workers who collect pollen and nectar, make honey, build honeycombs, manage hive temperature, defend the hive, and feed and care for the queen and larvae.
Bees produce honey using enzymes and evaporation. They bring nectar back to the hive and pass it along from mouth to mouth, which adds the enzymes. They then deposit it in chambers of the honeycomb, where workers buzz their wings to evaporate the water content, leaving behind concentrated sugars and other nutrients.
When the chamber is full, the bees seal it with a wax cap and store the honey for future consumption. Honey bees make more honey than they consume, which means some can be extracted for human use. You can harvest approximately 80 pounds from each hive each year.
Setting up a hive in your yard isn’t difficult. Here’s how to start:
Check with authorities. Talk to your local government and find out if there are any restrictions on beekeeping.
Do your research. There are excellent books and Web sites that describe how to set up an apiary. Also, a quick search of the Internet or the phone book should reveal a beekeeping group in your area. Local wisdom is invaluable in learning about the best regional materials and practices.
Find the equipment. Hive boxes, harvesting equipment, and live bees are all available online or through mailorder catalogs. If you’re more adventurous, you can try collecting a swarm of wild bees. Contact your animal control agency to find out how to get involved in swarm removal.
Consider allergies. If anyone in your family is allergic to bee venom, beekeeping might not be the hobby for you. With a little knowledge and communication, however, you can avoid problems. If you don’t harass them, bees won’t sting, because it literally kills them to do it. Wear protective clothing when working in a hive, and resist the urge to swat at a bee. If your neighbors are uneasy about the presence of bees, offer to share your honey. An ounce of honey is worth a pound of cure!
Colony collapse disorder
In recent years, wild honey bees have fallen victim to various microbes, diseases, and pests. Wax moths, for example, lay their eggs inside the hive, where the resulting larvae consume the wax and stored honey.
Most of these issues can be controlled in an apiary, but 2007 saw massive, unexplained hive die-offs. The cause of this so-called Colony Collapse Disorder remains a mystery, although some have hypothesized that the collective impact of introduced pests, pesticides, lack of wild habitat, and constant moving of commercial hives results in a mass weakening of bee immune systems.
Colony Collapse Disorder could have a significant economic impact, as honey bees are important pollinators of agricultural crops.
Friday, February 15, 2013
Chain link fencing
Well today I sign the contract to finally get the last part of the chain link fence in. I decided on this form of fencing for 2 reasons.
1. I don't have to worry about the fence during a hurricane, lost two fences already got tired of replacing it.
2. What better fencing to have for vines a great support for them. If allowed to grow the vines will make a great privacy screen.
I'm also going to be talking to my yard people to get a few beds done around trees and along what will be my new fence. Also cleaning up my hibiscus bed and hoping that they will come back. Might also take mom to or favorite nursery to pick up a few things. LOL

1. I don't have to worry about the fence during a hurricane, lost two fences already got tired of replacing it.
2. What better fencing to have for vines a great support for them. If allowed to grow the vines will make a great privacy screen.
I'm also going to be talking to my yard people to get a few beds done around trees and along what will be my new fence. Also cleaning up my hibiscus bed and hoping that they will come back. Might also take mom to or favorite nursery to pick up a few things. LOL

Friday, February 8, 2013
Succulents
I have become mmm how can I say addicted to another plant family the succulent. They come in so many sizes, shapes and colors. The blooms are delicate and range in colors of reds, pinks, yellows, whites and so on. It's hard to say which family is my favorite I truly love them all.
I plant mine in a catus mix (Miracle Grow) with added sand to it. I water them once a week or even less often. Be sure to water thoroughly until it runs out the bottom. DO NOT let them sit in water. Give succulents enough air movement, but keep them away from cold winter drafts. Place them so they are not too close together and the air is free to move around them. Fertilize with a low nitrogen liquid fertilizer (for example, 5-10-10). The first number on the fertilizer label denotes the nitrogen content. Get one whose first number is lower than the other two. Apply fertilizer at one-quarter the manufacturer's recommended rate.
Here are a few in my collection that I enjoy.........


I plant mine in a catus mix (Miracle Grow) with added sand to it. I water them once a week or even less often. Be sure to water thoroughly until it runs out the bottom. DO NOT let them sit in water. Give succulents enough air movement, but keep them away from cold winter drafts. Place them so they are not too close together and the air is free to move around them. Fertilize with a low nitrogen liquid fertilizer (for example, 5-10-10). The first number on the fertilizer label denotes the nitrogen content. Get one whose first number is lower than the other two. Apply fertilizer at one-quarter the manufacturer's recommended rate.
Here are a few in my collection that I enjoy.........


So give them a try!!!!
Thursday, February 7, 2013
Joined a club
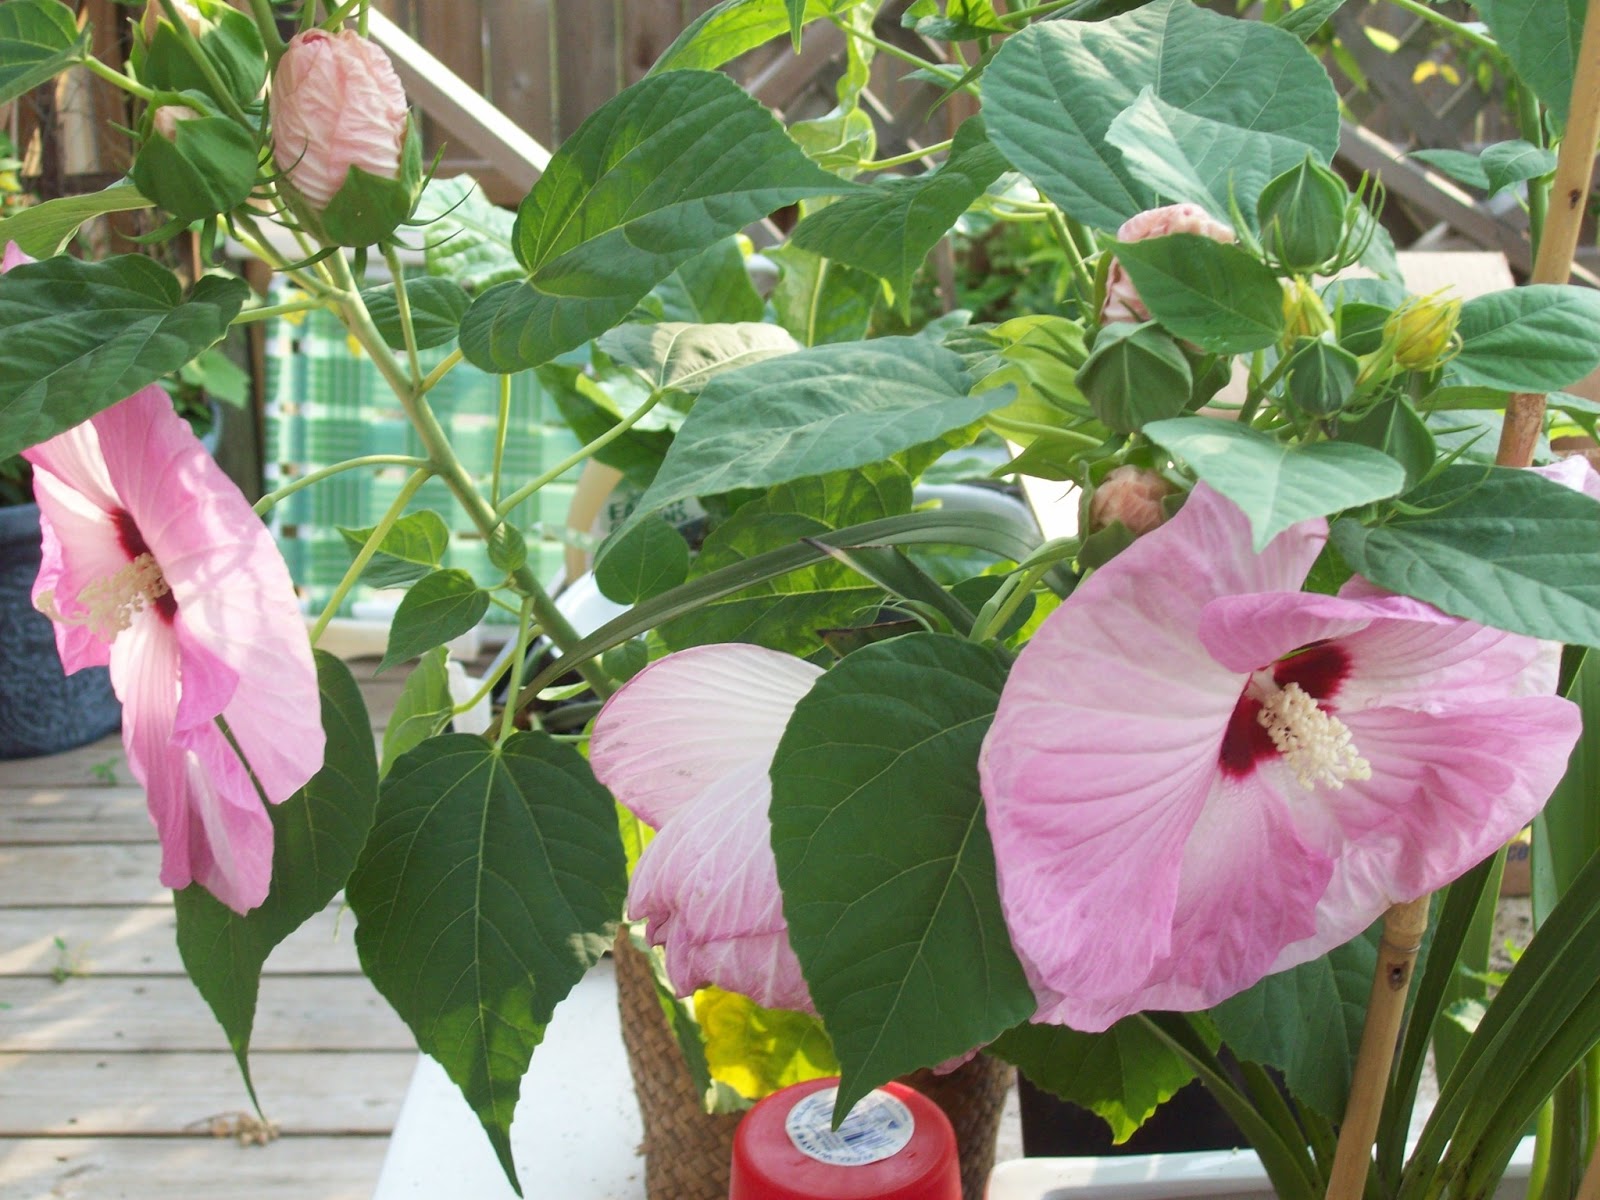
Well Tuesday night I joined a plant club The Space Center Hibiscus Society. I have become more interested in these beautiful plants this pass year thanks to Damon Veach. He's the President of Red Stick Hibiscus Association in Louisiana. He grows some of the most beautiful plants I've seen my plan is to go visit him in the near future. Below are some that I have growing in my yard now with plans to be adding more. I will take pictures of the progress of my hibiscus bed as it develops.


Thursday, January 31, 2013
Air Plants - Tillandsia
Air Plants, also known as Tillandsia, don’t require soil to grow, only moderate light and a good soak every week—very low-maintenance. Beautiful as modern home decor, in terrariums or as incredibly unique (and affordable!) housewarming or all-occasion gifts. These little guys have so much personality, beautiful blooms, and just fun to look at.
Tillandsias grow differently than most other plants, so they can be
confusing to the beginner. They are really very hardy, and require much less
attention than other plants. The following simplifies the instruction but
you can scroll down for much more specific information.If you are growing them indoors and the air is dry, you
will need (at minimum) to submerge the plant in water for 2-3 hours about every
two weeks. Otherwise, in a shade-house or unheated home, you can use a soaking
mist once or twice a week in summer, once a month in cooler weather.
A FEW TIPS:
- WATERING YOUR AIRPLANTS
Thoroughly wet your Tillandsia 2-3 times per week; more often in a hot, dry environment; less often in a cool, humid one. In conditions of extreme drying, and consequent moisture loss, Tillandsia cannot get replacement water from their roots like a terrestrial plant, or draw on internal reserves like a succulent.
The Water you use is important. NEVER USED DISTILLED WATER! Softened Water is a NO NO for the salt content. Filtered water, tap water that has sat long enough for the chlorine to dissipate, bottled water or RO are all fine. Pond water, aquarium, or rain water are all preferred but tap water is better than no water.
Outdoors you may never need to water Tillandsias hanging in a tree if you live in a temperate climate with some humidity. Indoors, the hotter and drier the air, the more you need to water.
Plants should be given enough light and air circulation to dry in no longer than 4 hours after watering. Wind can be a detriment as the plant dries too quickly. Remember that inside with a window fan as well. If the plant dries within a very short period of time, it is not hydrating at all.
Spray misting is insufficient as the sole means of watering but may be beneficial between regular waterings in dry climates to increase the humidity.
If the plant is in a shell, be sure to empty the water out. Tillandsias will not survive in standing water.
Under-watering is evidenced by an exaggerating of the natural concave curve of each leaf.
New Information: After wetting your plants thoroughly, turn them upside down and gently shake them. I have found that the water that collects near the base is detrimental if left to long. I have lost many stricta that way.
One last thing about watering your air plant. It is much better to water in the morning than at night. Air plants absorb the carbon monoide from the air at night instead of the day time. If the plant is wet, it does not breath therefore unless it can dry quickly at night, plan on morning baths.
AIR CIRCULATION
Following each watering, Tillandsias should be given enough light and air circulation to dry in 4 hours or less. Do not keep plants constantly wet or moist.
Do not allow to dry to quickly though. 1-3 hours is optimum
TEMPERATURE
Optimum temperature range for Tillandsias is 50 - 90 degrees F.
I have kept my plants outside during 40 degree F. weather but only for a night or two knowing it would be warm during the day. Tillandsia will die with frost.
FERTILIZER
Use Bromeliad fertilizer (17-8-22) twice a month. It is GREAT for blooming and reproduction! Other water-soluble fertilizers can be used at 1/4 strength (Rapid Grow, Miracle-Grow, etc.) if Bromeliad fertilizer is not available.
Note Here: If you use pond water or aquarium water, Don't use fertilizer
GROWTH CYCLE
Bromeliad Tillandsia have a life cycle of one plant growing to maturity and blooming. Before, during or after blooming (depending on the species) your plant will start producing young (PUPS), most plants will produce between 2 - 8 pups. Each plant will flower once in its lifetime, remember that each pup is a plant and it will bloom. Flowers can last from several days to many months, depending on the species, and different species bloom at different times depending also on its care and environment. You can expect blooms from mid winter through mid summer depending on the plant.
If you leave your plant to clump just remove the leaves of the mother plant as she starts to dry up, just pull the leaves out with a gentle sideways tug, if the leaf resists, its not dead yet, so just trim any dried areas instead. Once you've fully removed the mother plant, the gap that's left will quickly be filled in by the other plants growing & spreading.
REMOVING AIR PLANT PUPS
To remove the pups, they should be at least 1/3 to 1/2 the size of the mother plant. Hold both mother and pup at their bases and gently twist in a downward motion. If this does not happen easily, you may need to remove the pup by cutting downward as close to the mother as possible. Do not discard the mother plant yet, as long as she is still alive she will continue to produce more pups for you. Often taking several years after blooming before she finally dies.
MOUNTING YOUR TILLANDSIA
Tillandsias can be grown basically anywhere, on rocks, in a seashell or on coral, in ceramic or pottery, attached to wood (not pressure treated wood this is impregnated with copper, and copper will kill your plant). When considering what you are going to do with your plant don't forget that you have to be able to water it and it has to be placed somewhere that it will get sufficient light.
Try not to put Tillandsias in containers that hold water, they need to dry out. If you do place your plant in something that holds water, empty out the excess after watering your plant. The same thing applies when mounting your plant. Do not surround your plant with Moss. It will hold too much water and will rot your plant.
ATTACHING YOUR PLANT
You can use glue, wire, fishing line, twisty ties, nails or staples. Nails and staples can only be used on plants with a woody stolon or with sufficient roots. DO NOT staple your plant on its fleshy parts as it will kill it. Try to use a waterproof glue such as Liquid Nails or a Hot Glue gun, allowing the glue to cool for 5 seconds. Do not not use superglue or copper wire as these will kill your plant.
Below are pictures of some in my collection


To Do List for Houston Gardeners
February To Do
Planting- Strawberries can be planted now; hanging baskets are an ideal way to grow the berries to avoid fungus and insects attacking the fruit. Tomatoes can be transplanted into pots that can be brought inside for frosts and freezes; later on (after last frost) they can be planted in larger pots or in the ground. Lettuce can be started from seed, for continual harvesting. Set out fresh seeds every 2-3 weeks through the cool season. Bluebonnets are available for transplanting to make a great spring show. It is past the prime time to set out seeds for bluebonnets.Pests- Keep an eye out for loopers and aphids on cool season vegetables and annuals. Use the most organic solution possible for treating these insects. Check for scale insects on ornamentals such as camellias, hollies, magnolias, and Japanese blueberries. Treat with horticultural oil spray while it is still cool.
Lawns- Apply pre-emergent to stop spring weeds such as crabgrass, goosegrass and dallisgrass before they start. Corn gluten meal is an organic approach, while Barricade is a non-organic approach (both products can be found in our plant care shed).
Birds- Lower purple martin houses , clean and repair as necessary. Re-raise and position for martin scouts. Keep 20 feet away from trees and building for a clear flight pattern. Gold finches are feeding. Hang thistle or nyjer seed socks for these cuties. Keep suet feeders filled for hungry winter bird – their natural food sources are slim right now.
Freezes- Continue to keep an eye on the weather and stay informed on night time lows. Have frost cloth on hand for light frosts. If the temperature drops below 32, double wrap tender plants to ensure proper insulation. Avoid using plastic against foliage, but it can be used as the second exterior layer when covering plants. Remove plastic during the day. TIP: Heavy duty clothespins or spare bricks can be used to secure and weight down cloths.
Beds- Prune back perennials that are overgrown or have frost damage. This allows for a fresh spring start. Wait to cut back tropical plants until after the last frost, this includes hibiscus and bougainvilleas. Add in green annuals for spring color in the form of poppies, larkspur, hollyhocks, and delphiniums.
Pruning- Most shrubs, trees, and roses can be pruned now. Wait until after spring bloom cycles to prune spirea, azaleas, redbuds, and oriental magnolias.
Subscribe to:
Posts (Atom)